Updated June 2026. Based on the failure patterns behind our 11-brand peel-and-stick wallpaper testing plus reader-submitted install problems (~85 photos reviewed since 2023). Every "mistake" below maps to a specific failure mode — bubbling, lifting seams, mismatched patterns, removal damage — that traces back to the same prep- or hang-day decision. Cross-referenced against application instructions from Tempaper, Chasing Paper, NuWallpaper and Spoonflower.
Why peel-and-stick fails — and it's rarely the wallpaper
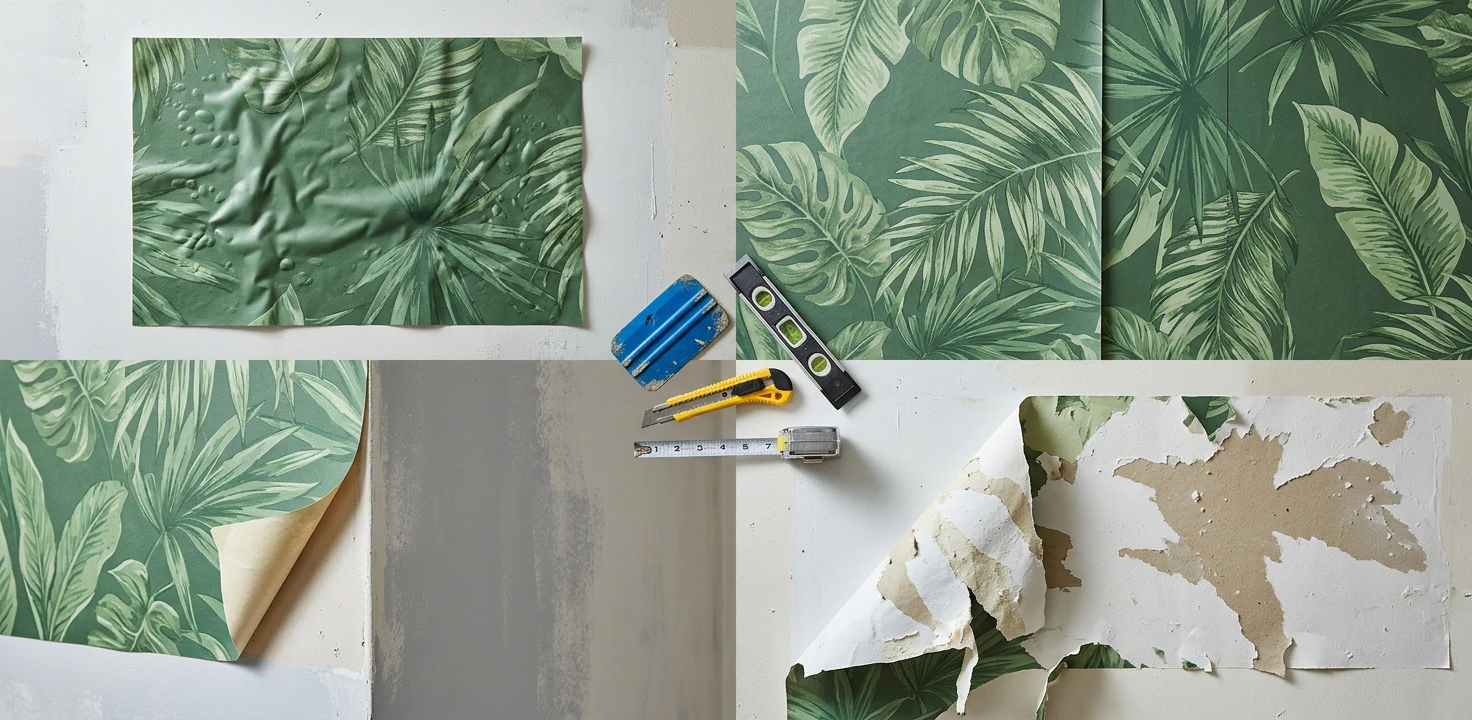
Peel-and-stick wallpaper is sold as the no-skill, no-commitment wall upgrade — and for the most part that's honest. The product itself is forgiving: repositionable, trimmable, removable. But scroll any renter-decor forum and the same four complaints repeat — "it's bubbling," "the seams don't line up," "the corners are curling," "it pulled my paint off." Every one of them traces back to a decision made before or during the hang, not to the roll you bought.
That's the good news. The gap between a botched accent wall and one that looks like a $1,200 installer did it isn't the $2/sq ft premium brand versus the budget one — it's an hour of wall prep, a $10 level, and understanding the pattern repeat before you peel the first panel. The seven mistakes below cover essentially every peel-and-stick failure we've documented.
This guide pairs with our 11 Best Peel-and-Stick Wallpaper Brands 2026 roundup — that page covers which wallpaper to buy for your pattern, room and budget, this page covers how to not waste it. Read them together before the rolls arrive.
Mistake #1: Skipping wall prep
What goes wrong: Panels that stick at first and lift at the edges within days, bubbles that won't smooth out, whole strips sliding down overnight. The adhesive never got a clean surface to grip.
Why it happens: A wall that looks clean is coated in things adhesive can't bond to — dust, hand oils around switches, kitchen grease film that drifts surprisingly far, cleaning-product residue. Peel-and-stick adhesive is pressure-sensitive and needs direct contact with a sound surface; even a thin film of dust cuts adhesion dramatically. People skip this step because the wall doesn't look dirty, then blame the wallpaper when it falls.
The fix: wash and dry every wall, every time.
- Wash with a degreasing cleaner or a little dish soap in warm water, working top to bottom. Pay extra attention around light switches, behind where furniture sat, and any kitchen-adjacent wall.
- Rinse with clean water so no soap film is left — residue is just a different thing the adhesive can't grip.
- Dry fully — at least a few hours, ideally overnight. Any moisture left in the surface gets trapped behind the panel and releases it.
- De-gloss if needed: on semi-gloss or high-gloss paint, a light scuff with a fine sanding sponge gives the adhesive more to grab (then wipe the dust off).
Mistake #2: Hanging over the wrong paint (or fresh paint)
What goes wrong: Two failures from the same layer. Over flat/matte paint: panels lift and corners curl within days no matter how clean the wall. Over fresh paint: it sticks fine, then pulls the paint clean off the wall when you remove it later — or even lifts on its own as the paint cures underneath.
Why it happens: Adhesion needs a smooth, sealed, cured film to grip. Flat, matte and many low-VOC "eco" paints dry to a chalky microtexture — great for hiding wall imperfections, terrible for adhesive, which can't bite into the powdery surface. Fresh paint is still off-gassing solvents and cross-linking for 3-4 weeks after it looks dry; wallpaper applied early bonds to an unstable film that's still moving.
The fix: match the surface to what peel-and-stick actually wants.
- Best surface: a cured satin or eggshell paint, at least 3-4 weeks old. This is the sweet spot the product is designed for.
- Flat or matte wall you can't repaint: expect a shorter hold and test a panel for 48 hours first. A light primer-and-eggshell repaint of just the accent wall is the reliable fix.
- Just painted? Wait the full month. The single most common removal-damage story starts with "I painted the weekend before."
- Bare or primer-only drywall: never hang directly — prime and paint with eggshell first, or removal will tear the drywall paper. (More in Mistake #7.)
Mistake #3: Starting without a plumb line
What goes wrong: The pattern drifts visibly off-vertical across the wall — by the far side, a vertical motif is leaning, or a panel that looked straight at the top is half an inch off at the floor. Compounds worse with every panel.
Why it happens: No wall, ceiling, corner or door frame is truly plumb — older homes can be off by an inch across a wall. Lining your first panel to the corner or ceiling line bakes that lean into every following panel, and the eye reads vertical drift instantly. People start at the corner because it feels like the natural edge, not realizing they're inheriting the house's crookedness.
The fix: set a true vertical reference and hang to it, not to the wall.
- Mark a plumb line one panel-width out from your starting corner using a level or a laser level. A long bubble level works; a laser level makes it effortless and is cheap now.
- Hang the first panel to the line, letting the corner edge fall where it may — you'll trim the slight wedge at the corner, and nobody sees a corner seam.
- Re-check plumb every 2-3 panels — small drift creeps back in; catch it before it accumulates.
- At the far corner and around windows/doors, let the trimmed edge absorb the wall's out-of-square — keep the pattern plumb, sacrifice the cut edge.
A $20-30 laser level is the single highest-leverage tool for a result that reads professional. Browse laser levels on Amazon →
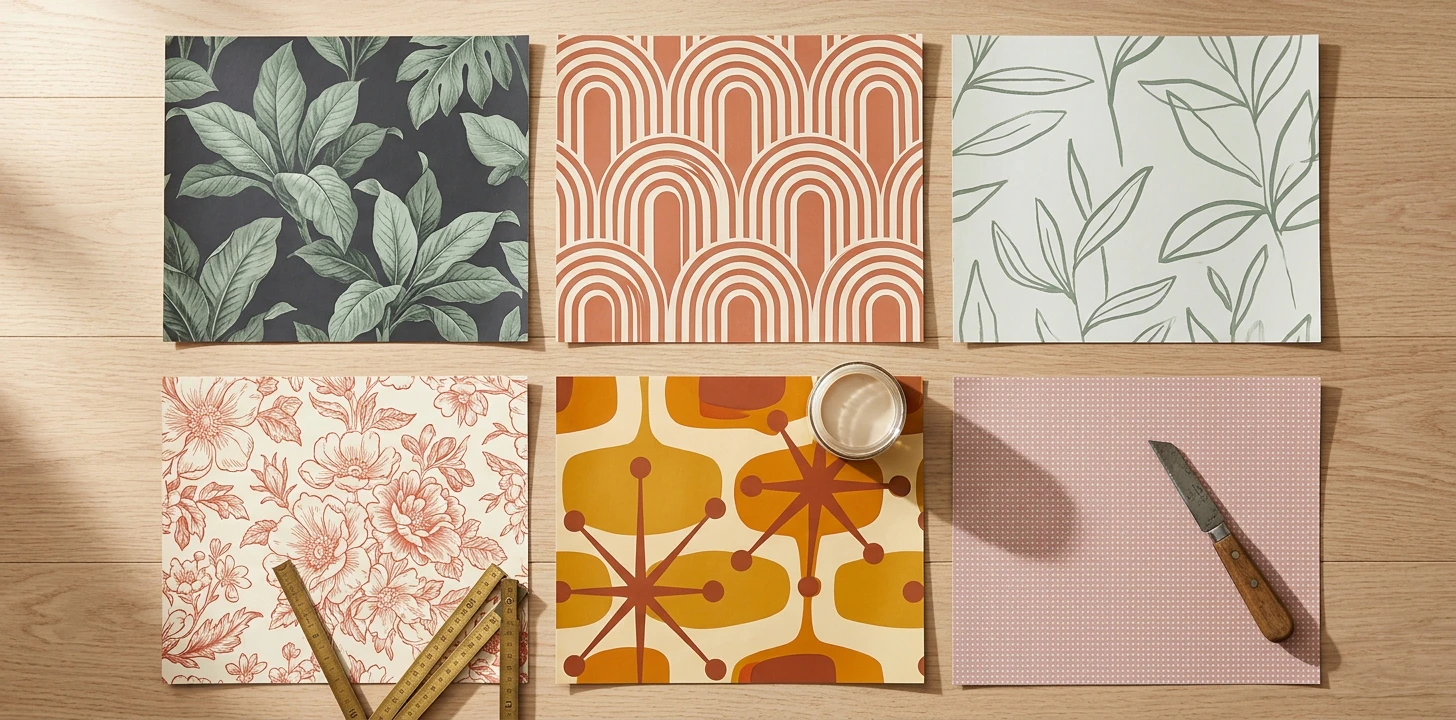
Mistake #4: Ignoring the pattern repeat and match
What goes wrong: Seams where the pattern jumps instead of flowing, a botanical that's beheaded at every join, or running short of paper halfway up the wall because the trim waste was far more than expected.
Why it happens: Patterned wallpaper has a vertical repeat and a match type, and most first-timers don't read either. A "straight match" lines up at the same height on every strip; a "drop match" lines up offset by half the repeat, which wastes more paper and trips people up when the second strip "doesn't fit." Cutting panels out of sequence, or buying exactly the square footage with no allowance, turns into mismatched seams and a mid-project re-order at a different dye lot.
The fix: plan around the repeat before the first cut.
- Find the repeat and match type on the product page or roll label. Buy 10% extra for straight match, 15-20% for drop match or large-scale patterns.
- Cut sequentially — each new strip from the roll right after the last, so the pattern continues naturally.
- Dry-align before sticking: hold the new strip against the hung one and slide it until the pattern matches at eye level before peeling the backing. Peel-and-stick repositions, so use that.
- Order one batch: all rolls at once, same dye lot — see the FAQ on quantity. Keep the offcut for repairs.
Mistake #5: Trapping air — bad smoothing technique
What goes wrong: Bubbles and wrinkles locked under the panel, creases that won't flatten, a surface that looks rippled in raking light no matter how much you press.
Why it happens: Air gets trapped when you stick a whole panel down at once or smooth from the top straight down — the descending edge seals air pockets in with nowhere to escape. The adhesive grabs on contact, so a bubble pressed flat in the wrong direction just relocates instead of releasing.
The fix: peel as you go and smooth from the center out.
- Don't unpeel the whole backing. Expose the top 12 inches, align to your plumb line, stick that band, then peel the backing downward a foot at a time as you work down the wall.
- Smooth from the center outward — center to edges, top to bottom — with a plastic smoothing tool or a clean dry sponge, pushing air toward the nearest edge where it can escape.
- Overlap your smoothing strokes so you don't leave an un-pressed lane that becomes a bubble later.
- Stubborn bubble? Peel back to it and re-smooth, or prick a tiny pinhole at its edge and press the air out — the hole vanishes in the pattern.
A plastic smoothing tool (a "wallpaper squeegee," $5-8) is non-negotiable — a credit card works in a pinch but covers too little area and leaves lanes. Browse wallpaper smoothing tools on Amazon →
Mistake #6: Hanging it in the wrong room
What goes wrong: A flawless install that fails anyway — edges curling in a steamy bathroom within months, a sun-baked accent wall lifting and fading, a kitchen panel going gummy near the stove. The hang was perfect; the room was the problem.
Why it happens: Peel-and-stick adhesive is happiest in stable temperature and humidity. Three environments routinely break that. Wet zones: inside a shower surround or right beside a splashing tub, steam and standing humidity creep under the edges and release the adhesive. Heat and grease: directly behind a stovetop, both attack the bond (and it's a fire/code consideration). Daily temperature swings: sunrooms, uninsulated exterior walls, and three-season porches expand and contract the wall and the film, working the edges loose over time.
The fix: match the room to the product's comfort zone.
- Bathrooms: powder rooms and walls away from the shower spray are great and hugely popular. Run the exhaust fan during and after showers — it's the difference between a 3-year and a 6-month result. Keep it out of the actual shower/tub splash zone.
- Kitchens: the wall above the backsplash, yes; directly behind the burners, no — use tile stickers or real tile there. See our wallpaper vs tile-stickers comparison for which surface belongs where.
- Sun and temperature swings: on a sun-blasted or uninsulated wall, expect a shorter life; light colors fade slower, and a UV window film helps.
- Climate-controlled interior walls: the easy 90% — bedrooms, offices, living rooms, hallways. This is where peel-and-stick just works.
Mistake #7: Reckless removal
What goes wrong: The renter's nightmare — pulling the wallpaper down takes the paint, or worse the drywall paper face, with it, turning a deposit-saving upgrade into a skim-coat-and-repaint repair.
Why it happens: Removal damage comes from the wall underneath, not the wallpaper, plus technique. Fresh paint (under ~4 weeks) is still curing and bonds to the adhesive, so both come off together. Bare or primer-only drywall has no protective film — the adhesive grabs the paper face and tears it. Yanking fast at a sharp angle concentrates peel force and lifts whatever is weakest.
The fix: set up for clean removal at install time, and remove slow.
- Only hang over cured, painted walls — a fully cured eggshell or satin film is what makes the renter promise real. This is decided at install, not removal.
- Remove slowly and low: pull each strip back against itself at a shallow angle (close to parallel with the wall), not straight out. Slow and low spreads the force.
- Warm stubborn sections with a hairdryer to soften the adhesive — it releases far more cleanly warm than cold.
- If it starts taking paint, stop, warm that section more, and slow down further. A little residual adhesive left behind wipes off with a damp cloth or mild adhesive remover — far better than lifted paint.
Watch: rescuing wallpaper that won't stick
If your panels are already lifting at the edges or sliding off, this walkthrough shows the rescue in motion — diagnosing whether it's the wall, the paint or the technique, then re-prepping and re-hanging so it actually holds. It's the practical version of Mistakes #1 and #2 above, and watching it once makes the "is it my wall or my wallpaper?" call much easier on your own panels.
"How To Fix Peel And Stick Wallpaper Not Sticking" by The Savvy Professor — embedded from YouTube
The $40 install tool kit
Like the other mistakes guides, peel-and-stick prevention isn't about a pricier roll — it's a short tool list and the rules above. The full kit, all linked for one-click ordering:
- Plastic smoothing tool / wallpaper squeegee ($5-8) — the single tool that prevents Mistake #5. A felt-edged one won't scratch delicate prints. Browse smoothing tools on Amazon →
- Laser level or long bubble level ($20-30) — the plumb line from Mistake #3, the biggest single upgrade to a professional look. Browse laser levels on Amazon →
- Snap-blade utility knife + spare blades ($8-12) — clean trims at ceiling, baseboard and outlets need a fresh sharp edge; a dull blade drags and tears. Browse snap-blade knives on Amazon →
- Metal ruler or wide putty knife ($6-10) — a straightedge to trim against for crisp ceiling and baseboard cuts.
- Tape measure ($8) — for the Mistake #4 quantity math and panel layout.
Haven't picked the wallpaper yet? Our 11 Best Peel-and-Stick Wallpaper Brands 2026 roundup → ranks Tempaper, Chasing Paper, Spoonflower and 8 more by removability, pattern depth and price per sq ft — including which forgive a first-time install and which demand precision. Pair the brand pick with this mistakes guide and the wall goes up clean.
 11 Best Peel-and-Stick Wallpaper Brands 2026
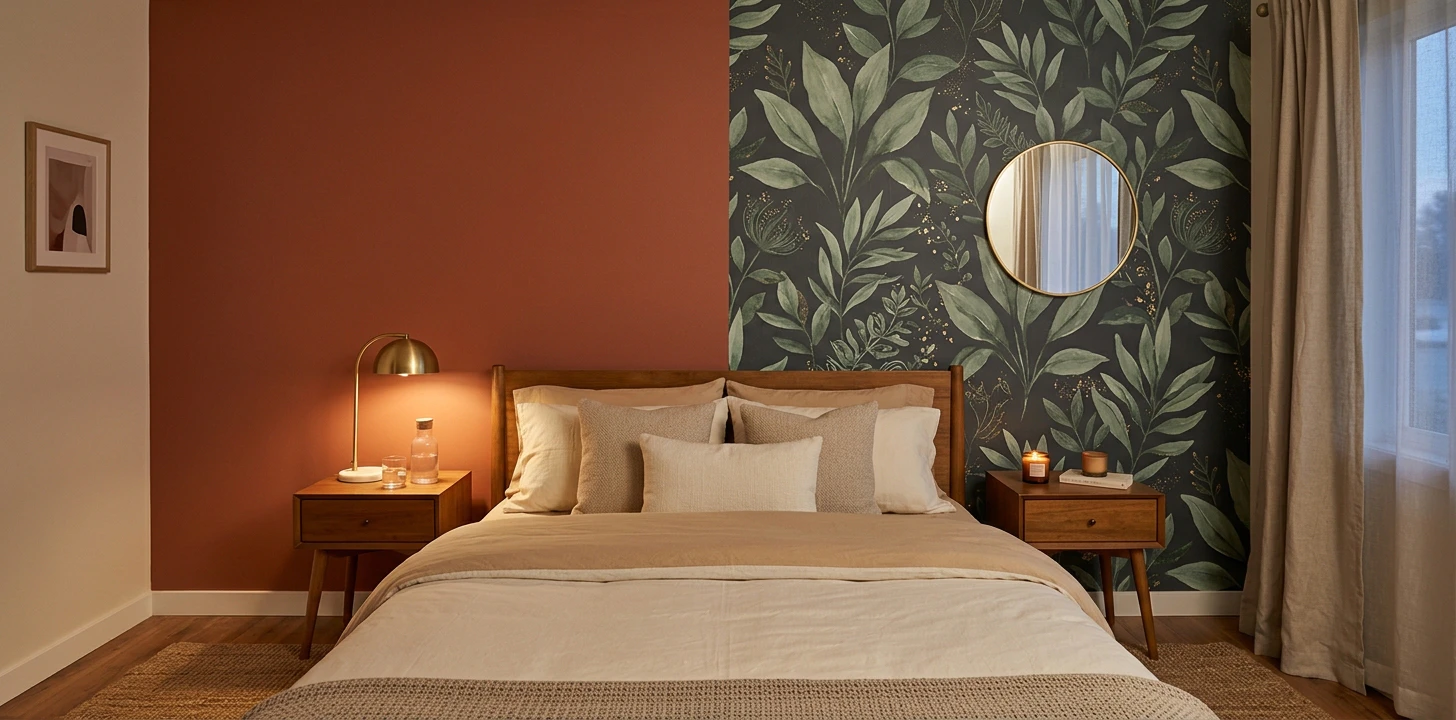 Wallpaper vs Paint — Bedroom
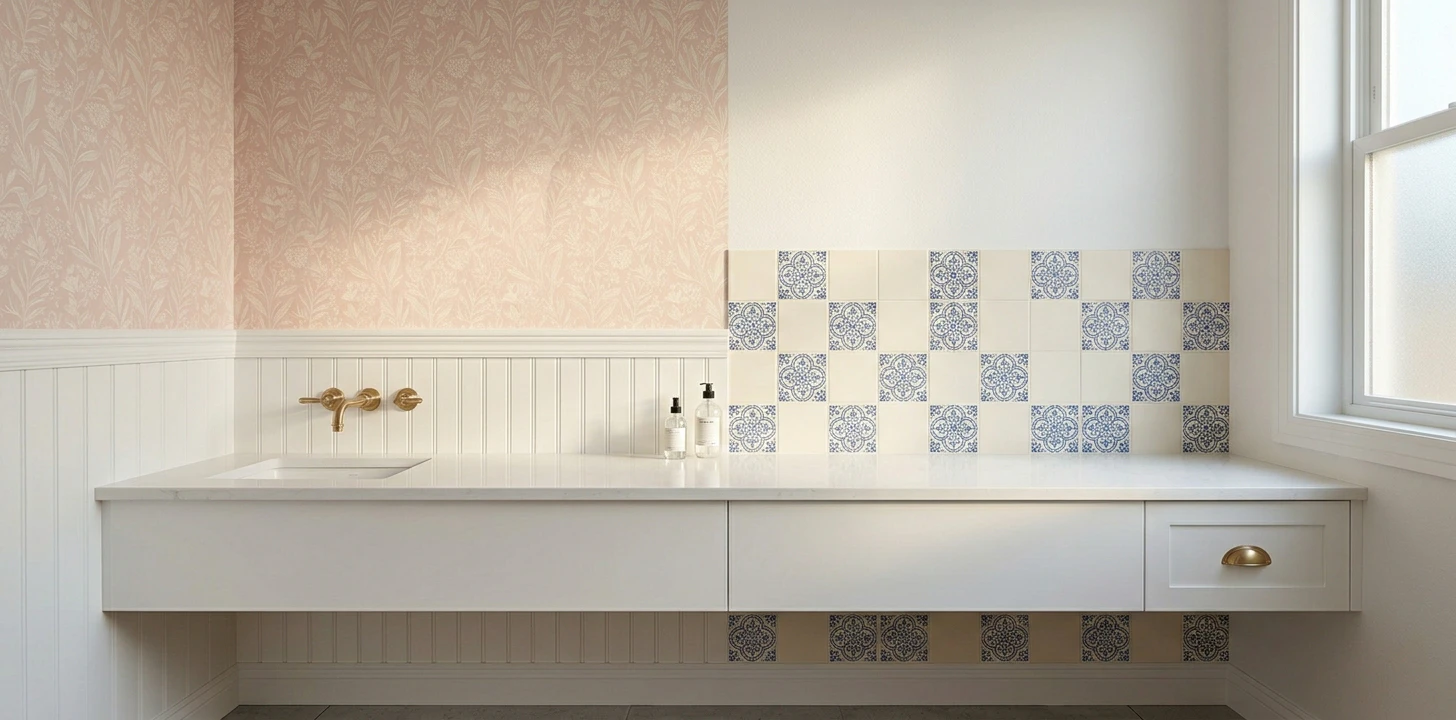 Wallpaper vs Tile Stickers — Bathroom
 Wallpaper vs Paint — Home Office