Updated June 2026. Based on multi-year failure-pattern data from our four test garages plus reader-submitted DIY epoxy failures (~120 photos reviewed since 2023). Every "mistake" below corresponds to a specific failure mode we've observed multiple times across different products and climates. Cross-referenced against manufacturer technical bulletins from Rust-Oleum, Citadel, ArmorPoxy and Behr.
Why 60-80% of DIY epoxy jobs fail within 5 years
Walk through any neighborhood where 2-car garages get DIY-coated and look at the floors. The pattern is consistent: showroom-glossy for the first 12 months, edge curl starts at 18 months, large-sheet peeling by year 3, and a homeowner standing over a $200 failed kit asking "why did this happen to me." Manufacturer data and our own failure-mode tracking both put the 5-year failure rate for DIY epoxy at 60-80% across all chemistries.
Here's the part nobody tells you up front: almost none of those failures are the product's fault. The brand pages obsess over chemistry, gloss level, and flake colors because those are the visible differentiators in the showroom. But the variables that actually determine whether your coating lasts 3 years or 20 years happen before you open the kit — in concrete prep, moisture verification, temperature window, and chemistry-to-climate matching. Skip any of these and even the best product on the market will peel.
The good news: every one of the seven mistakes below is preventable with $20-60 of additional tools and 4-6 hours of additional prep time. The seven categories cover roughly 90% of all DIY epoxy failures we've documented. If your floor doesn't fail through one of these seven modes, it likely won't fail at all.
This guide pairs with our 11 Best Garage Floor Coatings 2026 roundup — that page covers which product to buy, this page covers how to not waste it. Read them together if you're committed to making a coating last 15-20 years.
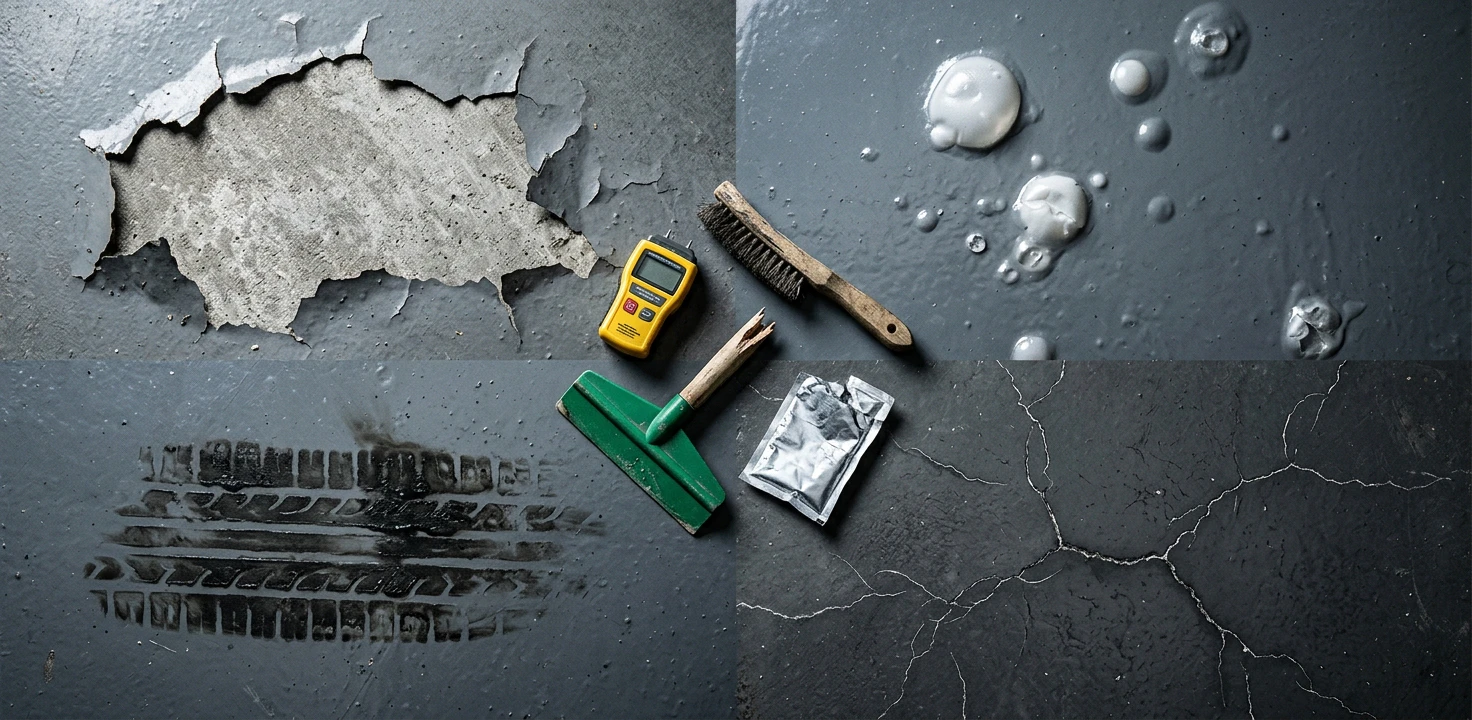
Mistake #1: Skipping the concrete moisture test
What goes wrong: 60-90 days after application, you notice white blister bubbles trapped under the coating film, or scattered patches where the coating is delaminating from the concrete in dime-to-quarter-sized circles. Water vapor migrating up through the slab is pushing the coating off from underneath. The coating itself is intact; the bond to concrete is broken from below.
Why it happens: Concrete is porous and holds moisture even when the surface looks bone dry. Every garage floor coating manufacturer specifies a maximum slab moisture content (typically 3-5 lbs per 1,000 sq ft per 24 hours) above which the coating is guaranteed to fail. Most DIYers don't know this spec exists and apply over slabs that look dry but are still releasing 8-15 lbs of moisture per 1,000 sq ft. The coating goes on fine. Then the vapor pressure under the cured film delaminates it within 60-90 days.
The fix: Two-step verification before you open any product kit.
- The plastic-sheet test (free, takes 24-48 hours). Tape a 2×2 ft square of clear plastic sheet to the concrete on all four edges, fully sealed with painter's tape. Place sheets at 3-4 spots across the garage (corners, center, near garage door). Wait 24-48 hours. Lift each sheet. If you see condensation on the underside of the plastic or darkening of the concrete underneath, the slab is too wet — let it dry another 2-4 weeks and re-test.
- Digital moisture meter (optional, ~$30-60). A pin-type concrete moisture meter gives you a numeric reading at multiple spots. Aim for <4% surface moisture before coating. Browse concrete moisture meters on Amazon →
Special case — new concrete: never coat a slab less than 60 days old, regardless of how dry it looks. Concrete cures for 28 days minimum, then equilibrates with ambient moisture for another 30+ days. Coating before day 60 is rolling dice with a manufacturer-disallowed condition.
Mistake #2: Inadequate concrete profile (no etching or grinding)
What goes wrong: Large-sheet peeling within the first 6-18 months. The coating bonds to itself in a continuous film but never grips the concrete. You can lift the failed sheet in one piece and see bare clean concrete underneath. The back of the failed coating is smooth, with no concrete dust or aggregate stuck to it.
Why it happens: Concrete that's been power-troweled smooth (most modern slabs) has a glass-hard surface called "laitance" — fine cement paste pressed to the surface during finishing. Epoxy and polyurea need micro-texture to mechanically grip the substrate. Smooth laitance gives them nothing to grip. The coating bonds chemically to itself, not mechanically to the concrete, and peels as a single intact film when stress eventually breaks the weak adhesion.
The fix: Open the concrete pores before coating. Two methods, pick by what's on the floor.
- Muriatic acid or citric acid etching ($15-30, 2-3 hours of work). Works only on smooth, sound, never-coated concrete. Mix per manufacturer dilution, mop on, wait until fizzing stops (5-15 min), neutralize with baking soda solution, rinse twice, let dry 24 hours. After etching, the concrete should feel like 80-grit sandpaper — that's the profile you need. If it still feels smooth, etch again. Browse concrete etchers on Amazon →
- Mechanical grinding ($40-60/day rental + $20 diamond pads, 4-6 hours of work). Required for any concrete with existing paint, sealer, oil-soaked patches, or polished surfaces that won't etch. Rent a walk-behind concrete grinder from Home Depot or a local tool rental yard. Grind in overlapping passes until the surface has uniform open pores visible to the eye. This is the safer default if you're unsure what's on the existing floor.
The water-bead test: sprinkle a few drops of water on the prepped concrete. If they soak in within 60 seconds, you have proper profile. If they bead up or sit for 5+ minutes, the surface is still sealed — re-prep until water absorbs.
Mistake #3: Coating over existing paint or sealer
What goes wrong: Total system failure within 2-3 years. The new coating bonds beautifully to the old paint or sealer underneath. Then the bond between old paint and concrete fails (because the old paint was never designed for this kind of stress), and your new $200 coating peels off in sheets — taking the old paint with it.
Why it happens: You can build a coating system only as strong as its weakest layer. Garage floor paint (the gray oil-based or latex paint sold for $25-40/gal at big-box) is designed for foot traffic, not vehicle traffic, and bonds poorly to bare concrete with no mechanical interlock. When you coat over it with epoxy or polyurea, you're now relying on the original paint's bond to hold the entire stack. It can't.
The fix: Strip everything down to bare concrete before applying any new coating. There is no exception.
- Old paint: chemical paint stripper (methylene-chloride based or eco-alternative) applied per label, scraped, then ground with diamond pads to remove residue. Plan 8-12 hours of labor for a 2-car garage. Browse concrete paint strippers on Amazon →
- Old sealer: mechanical grinding only. Chemical strippers don't reliably remove silicone-based sealers. Grind back to clean concrete and verify with the water-bead test.
- Old failed epoxy: if it's already failing in patches, grind the entire floor. Spot-removal leaves transition zones that re-fail within a year.
This is the single most labor-intensive mistake to fix in retrospect — far easier to do correctly the first time. If you inherit a garage with mystery paint or sealer on the floor, budget an extra full day plus $40-60 for grinder rental before opening the coating kit.
Mistake #4: Applying in the wrong temperature window
What goes wrong: Three failure patterns depending on which temperature variable was off. Too cold: coating cures too slowly, attracts dust during the extended open time, develops orange-peel texture or never reaches full hardness (stays slightly soft, picks up tire marks easily). Too hot: coating cures too fast, pot life drops from 30 min to 5-10 min, you can't finish applying before it sets in the tray, you get lap lines and texture variations. Too humid: moisture in the air gets trapped in the curing film, producing milky white blush or surface tackiness that never fully clears.
Why it happens: Coating manufacturers specify a tight application window — typically 50-85°F air AND substrate temperature, with relative humidity under 80%. Most DIYers check air temp on their phone weather app, ignore concrete substrate temp (which can be 10-15°F different from air temp), and never check humidity. Then they apply on a hot August afternoon at 92°F or a humid spring morning at 88% RH and wonder why the result looks streaky.
The fix: verify three temperatures and a humidity reading before opening the kit.
- Air temperature — read from a thermometer in the garage, not the phone weather app (garage interior can be 15°F warmer than outdoor temp on sunny days, or 10°F cooler on overcast spring mornings).
- Concrete surface temperature — read with an infrared thermometer pointed at the floor. This is the temperature the coating actually feels during cure. Concrete is a thermal mass and lags air temp by several hours. Browse infrared thermometers on Amazon →
- Dew point — must be at least 5°F below concrete surface temp, or moisture condenses on the floor during cure. Easy to miss in spring and fall. A $15 indoor hygrometer gives you humidity; subtract from concrete temp to estimate dew margin.
- Forecast — temperature must stay within the application window for the full cure time (24 hours minimum for polyurea, 5-7 days for epoxy). Don't apply on a 75°F Saturday if Sunday's forecast drops to 38°F overnight — the unfinished cure will arrest.
The sweet spot for almost all chemistries: 60-75°F air and substrate, humidity under 65%, stable forecast for 48-72 hours. Spring and fall windows are usually better than summer for this reason.
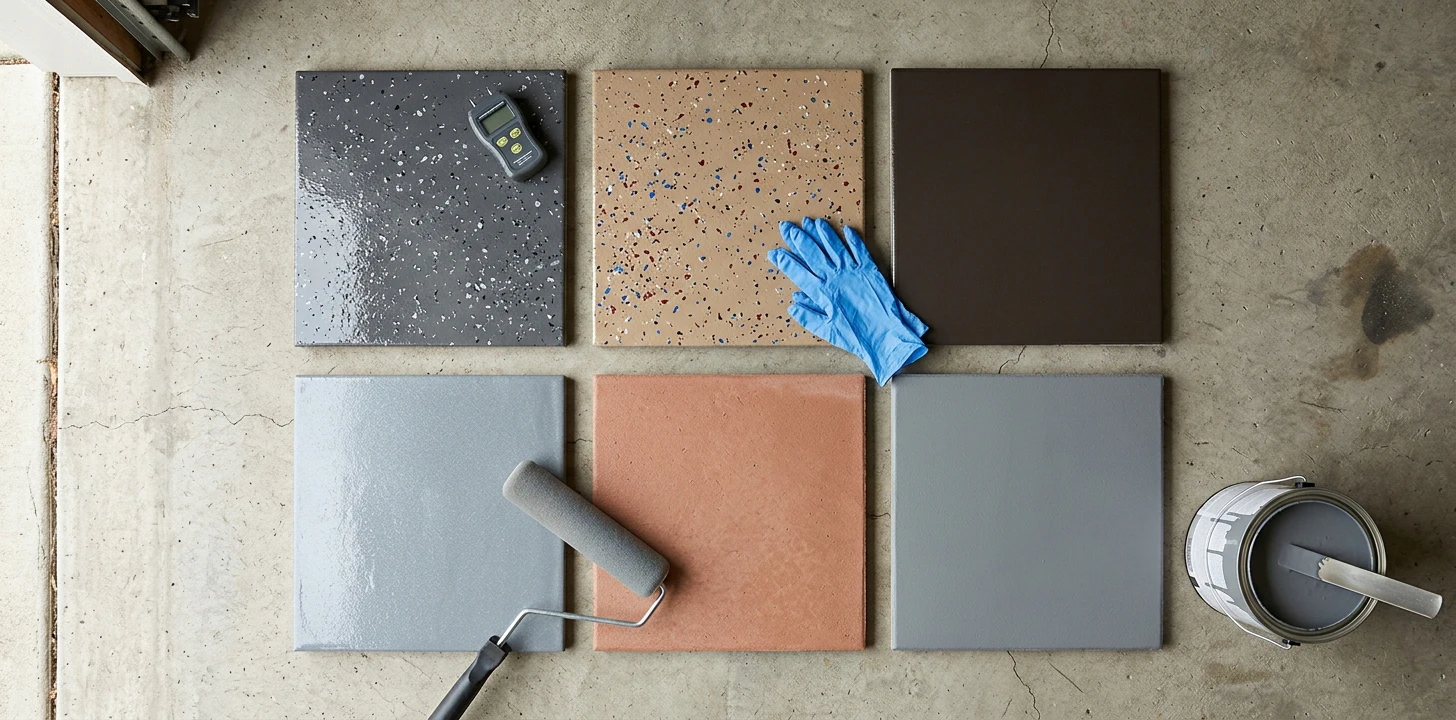
Mistake #5: Wrong chemistry for your climate (the hot-tire pickup trap)
What goes wrong: Hot-tire pickup — the failure mode where the coating physically lifts off the concrete and bonds to your car tires. You drive in from a 95°F summer day, park, and 2 hours later when you back out, you hear the unmistakable peeling sound and watch your $200 floor coating leave with the tires. Most common in hot climates (Arizona, Texas, Nevada, southern California, Florida summers) with standard 2-part epoxy coatings.
Why it happens: Tire surface temperature after highway driving reaches 130-180°F. Standard 2-part epoxy has a softening point around 140°F — that's the temperature at which the cured film becomes thermoplastic and bonds chemically to other materials it contacts. Tire rubber happens to be one of those materials. The hot tire fuses to the softened epoxy, cools as the car sits, and on the next departure, the now-cool-but-bonded rubber tears the epoxy away from the concrete.
The fix: match coating chemistry to your climate, not to the marketing.
- Hot climates (sustained summer highs above 90°F): use polyurea (Rust-Oleum RockSolid Polycuramine) or polyaspartic (Citadel, Floorguard, ArmorPoxy). Both chemistries hold their hardness up to 250°F+ and resist hot-tire pickup. Browse polyurea garage coatings on Amazon →
- Cold climates (sustained winter lows below 20°F): use polyurea or polyaspartic. Both are flexible films that survive freeze-thaw cycling. Epoxy cracks under the same conditions.
- Moderate climates (Pacific Northwest, mid-Atlantic, upper Midwest): standard 2-part epoxy works if you follow cure times. Hot-tire risk is low because peak tire temps rarely exceed 130°F.
- Workshop floors (no vehicle traffic): any chemistry works. Pick by budget and aesthetic — the hot-tire variable is irrelevant.
The full chemistry-by-climate breakdown is in our 11 Best Garage Floor Coatings roundup. Short version: if you live anywhere that gets above 90°F or below 20°F regularly, spend the extra $50-100 for polyurea over basic epoxy. It's the difference between a 5-year and a 15-year floor.
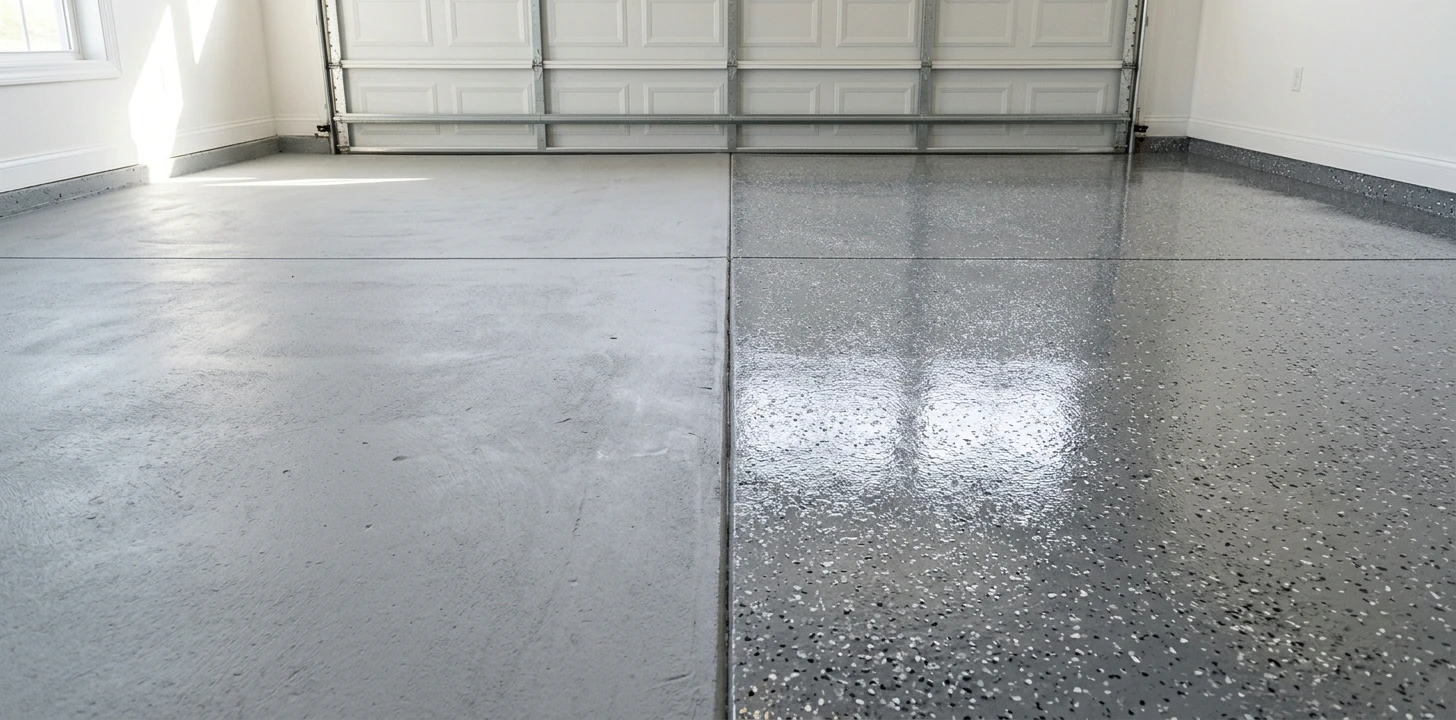
Mistake #6: Going single-coat where two-coat is needed
What goes wrong: Premature wear-through in traffic lanes — the strip of floor where tires roll in and out of the garage. The coating looks fine everywhere else but the wheel paths show concrete starting to peek through within 18-36 months. Edge curl at expansion joints. Reduced gloss in scuffed areas.
Why it happens: Single-coat coatings (Behr Premium 1-Part Epoxy, some Polycuramine kits) deliver 12-18 mil dry film thickness in one application. That's enough for foot traffic and light vehicle use but borderline for daily-driver garages. Two-coat systems (Rust-Oleum EpoxyShield, most ArmorPoxy and Citadel kits) deliver 24-30 mil dry thickness — the threshold for full hot-tire resistance and 10+ year residential lifespan under daily-driver conditions.
The fix: match coating system to actual use.
- Workshop with no vehicle traffic, or rarely-used garages: single-coat is fine. Save the time.
- Daily-driver 1-car garage, mild climate: single-coat works for 5-7 years. Acceptable if you don't mind redoing in year 5.
- Daily-driver 2-car garage, any climate: two-coat is the right call. Plan a full weekend with proper inter-coat timing (4-12 hours between coats depending on chemistry).
- Workshop with vehicle traffic (lift, project cars, etc.): two-coat plus a clear urethane top coat. The third layer adds chemical resistance against the inevitable brake-fluid and gear-oil drips.
The labor delta between single and two-coat is real (one full extra day) but the lifespan delta is roughly 2.5×. Pro-rated cost per year of service, two-coat is significantly cheaper despite the higher kit price. Browse two-coat epoxy kits on Amazon →
Mistake #7: Driving on it before full cure
What goes wrong: Tire imprints permanently embedded in the coating, localized hot-tire pickup in the first parking spot used, or "soft floor" complaints months later where the coating never developed full hardness because it was stressed before the chemistry was complete.
Why it happens: Coating chemistry continues curing for days after the surface feels dry. "Touch dry" (skin formed on top) happens in 4-8 hours. "Walk on" happens in 24 hours. "Park on" requires far more — the entire film thickness needs to reach final crosslink density. Epoxy needs 5-7 days. Polyurea needs 24 hours. Polyaspartic needs 4-12 hours. The surface feeling dry is not the same as the coating being fully cured.
The fix: respect the manufacturer's full cure time and have a parking plan before you start.
- Epoxy: 24 hours walk-on, 48 hours light foot traffic, 5-7 days vehicle traffic, 14 days full chemical resistance. The week of "where do I park" is the real cost of choosing epoxy — plan for it before you commit.
- Polyurea (Rust-Oleum RockSolid Polycuramine): 8 hours walk-on, 24 hours vehicle traffic, 7 days full cure. The "drive on it tomorrow" promise is real and well-documented.
- Polyaspartic (Citadel, Floorguard, ArmorPoxy): 1-2 hours walk-on, 4-12 hours vehicle traffic, 24-48 hours full cure. The same chemistry used in commercial garages where downtime is expensive.
One protection trick for the first 30-60 days: after full cure, put a parking pad or large garage mat under the hot-zone tire positions for the first 60 days. The mat absorbs the worst of the thermal stress while the coating reaches its final molecular density. After 60 days you can remove the mats and use the floor normally. Browse garage parking mats on Amazon →
Watch: the mistake you can't fix with prep
The seven mistakes above are all technical — prep, chemistry, cure. There's an eighth that no amount of prep can undo: a finish decision you regret every time you sweep. Tim Seay's walkthrough compares real finished garage floors side by side and shows how the choice looks after months of actual use, dust and tire traffic — worth five minutes before you order a kit color.
"This One MISTAKE Could Ruin Your Epoxy Garage Floor Project" by Tim Seay — embedded from YouTube
The right product chain for each chemistry
Skipping the seven mistakes is 90% of the job. The remaining 10% is picking products that don't fight you. Quick chain for each chemistry, all linked to Amazon for one-click ordering:
Polyurea path (easiest weekend, hot/cold climates):
- Coating: Rust-Oleum RockSolid Polycuramine kit ($150-200)
- Prep: concrete etcher + moisture meter
- Application: 9-inch foam roller, 3-inch brush for edges, broadcast flakes if not included
Polyaspartic path (fastest cure, premium look):
- Coating: Citadel or Floorguard polyaspartic kit ($200-300)
- Prep: rental concrete grinder (required, not optional for polyaspartic substrate spec)
- Application: squeegee + back-roll technique, urethane top coat optional
Epoxy path (budget, mild climates only):
- Coating: Rust-Oleum EpoxyShield two-coat kit ($120-180)
- Prep: muriatic acid etcher + neutralizing rinse
- Application: full weekend, 5-7 day cure before parking
Ready to commit to a brand? Our 11 Best Garage Floor Coatings 2026 roundup → breaks down all the polyurea, polyaspartic, and epoxy picks above with full price/coverage/cure data plus brand-by-brand pros and cons. Pair this mistakes guide with the brand picks for the complete project plan.
 11 Best Garage Floor Coatings 2026
 Garage Floor: Painted Concrete vs Epoxy
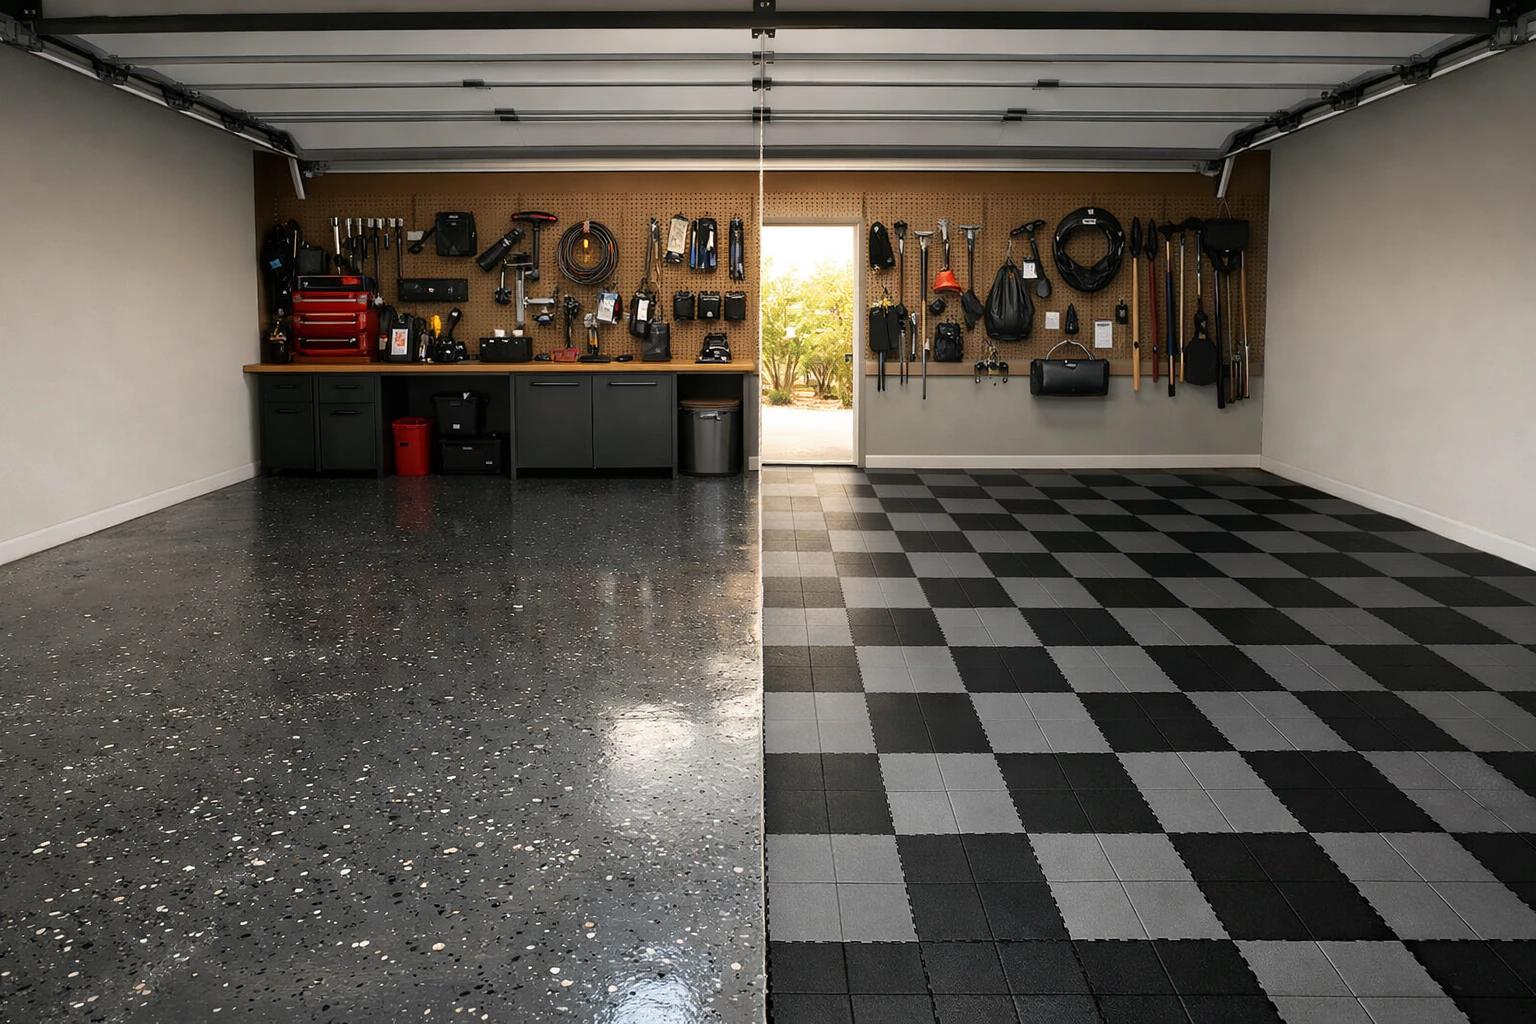 Garage Floor: Epoxy vs PVC Tiles
 Garage Walls: Paint vs Pegboard